This guide is aimed at PTC Creo Parametric users who frequently work with complex assemblies and want to reduce the number of objects, mesh size, and triangle count of models in their Jigs.
Export formats
For best results, we recommend you export all Creo assemblies or parts as STEP files for importing into JigSpace.
The following process works for both parts and assemblies in Creo. Due to the nature of file conversion, this approach is recommended to retain as much geometry and metadata as possible while giving you greater control over the output.
Planning ahead
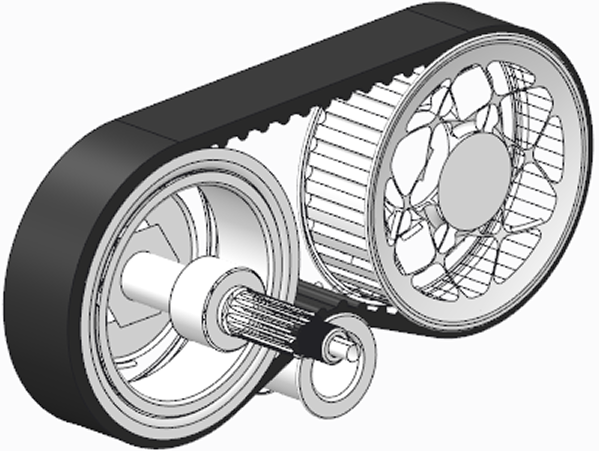
Before you begin, consider which components, sub-assemblies, or features will need independent movement in JigSpace, as these should be simplified or shrinkwrapped separately. PTC claims that shrinkwrapping can reduce memory usage by up to 90%, depending on the complexity of your model, your quality settings, and number of hidden parts.
For example if you want to create an animated exploded view of part assemblies, or animate moving parts in key steps of your Jig, they will need to be seperate parts when exported to JigSpace.
The Shrinkwrap model is stored as a separate part file, and is not associative, meaning it will not update when the source model is modified.
Using shrinkwrap
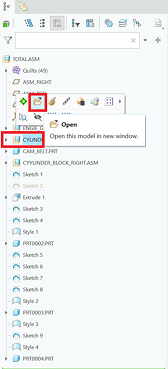
1. In the model tree, right-click each sub-assembly or component you want to simplify and select Open
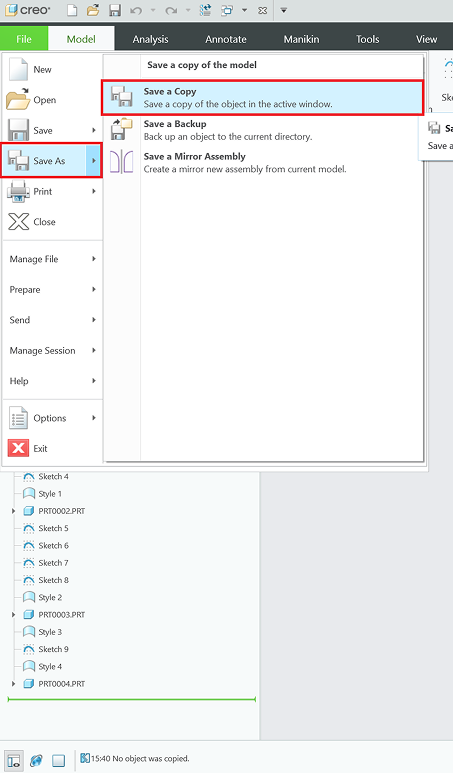
2. Go to File > Save As > Save a Copy
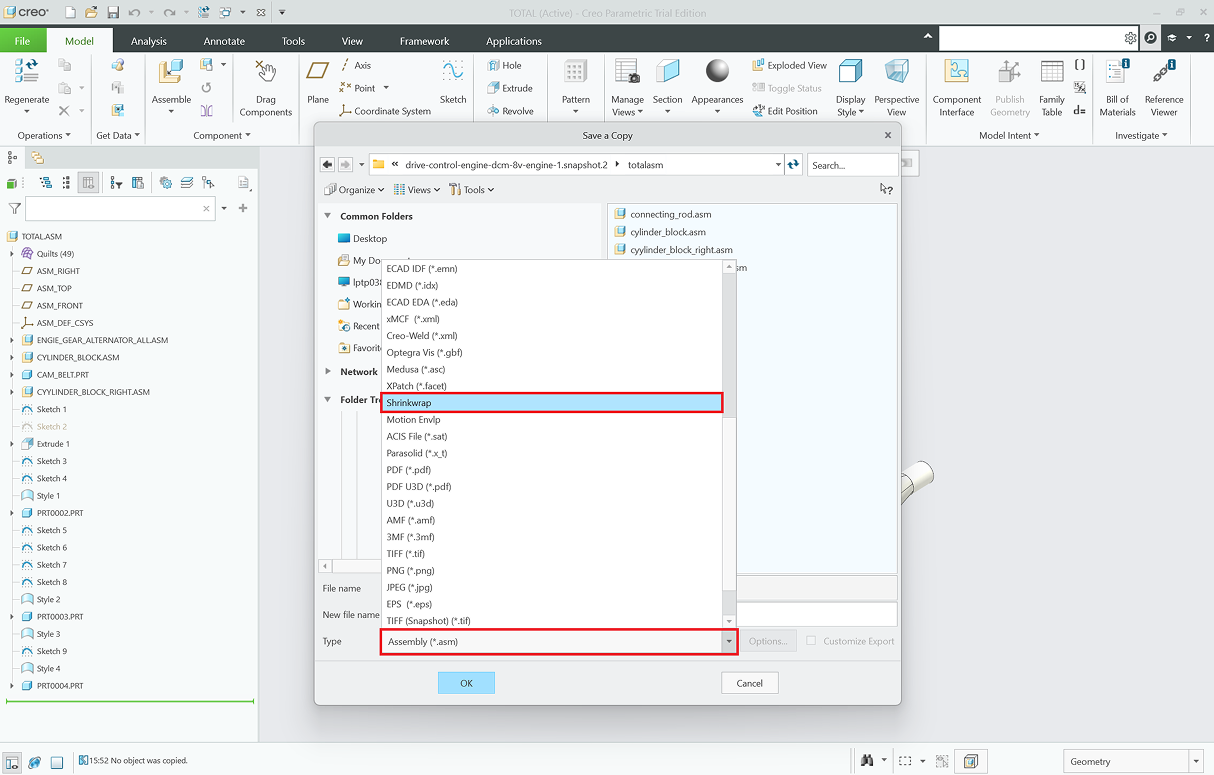
3. Set the Type to Shrinkwrap, enter a new file name, and click OK
Shrinkwrap methods
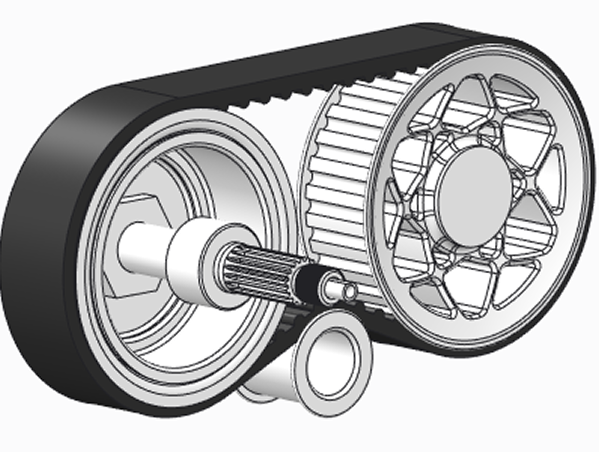
Choose from one of the three Shrinkwrap creation methods. We recommend using Surface Subset for visualization purposes, however there are uses for Faceted Solid and Merged Solid.
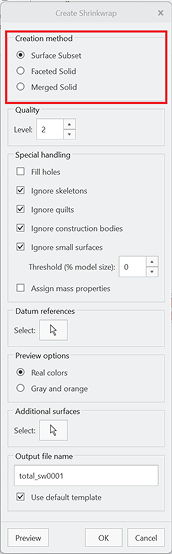
Surface Subset
Creates a lightweight collection of external surfaces and datum features that visually represent the outer shell of the model.
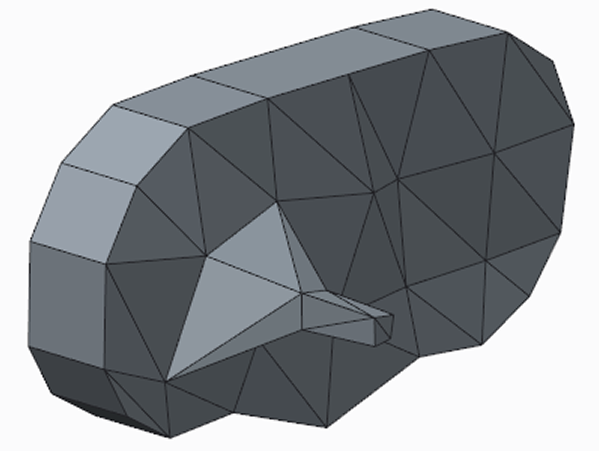
Faceted Solid
Generates a polygonal approximation of the model geometry. We don't recommend this for accurate visualization or downstream use.
Merged Solid
Produces a solid body with accurate geometry. If the original model contains internal cavities, Creo will automatically fill them with solid geometry.
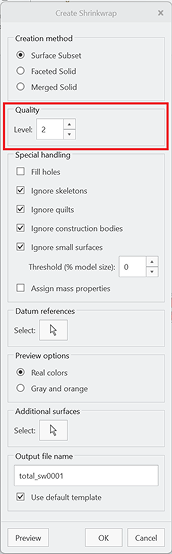
Surface subset quality
Set the Quality Level (1–10, where 1 is lowest and 10 is highest). You can adjust up or down depending on the level of detail needed in the Shrinkwrap output. As a general guide:
- Lower Quality (1–4): Generates a simplified model with less geometric detail and fewer polygons. Ideal for reducing file size and improving performance in real-time spatial visualization like JigSpace.
- Higher Quality (7–10): Produces a more detailed and accurate model with a higher polygon count. Useful when visual fidelity is important, but may result in larger files and slower performance if used too much.
Special handling options
Use special handling options to fine-tune the detail of your shrinkwrapped model:
- Fill holes: Fills in surface openings to create a watertight exterior, useful for simplifying geometry or reducing visual clutter. Recommended if holes are not required to be visible in your Jig 3D presentation.
- Ignore skeletons: removes internal references that aren’t needed for visual representation.
- Ignore construction bodies: focuses the Shrinkwrap on actual manufactured geometry.
- Ignore small surfaces: eliminates small patches or sliver faces to reduce file complexity and improve rendering performance.
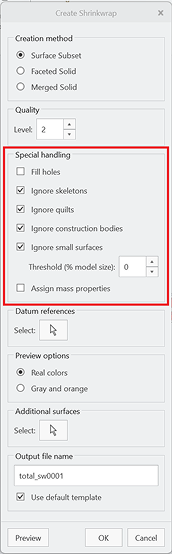
The following options are not relevant to models exported to Jigs:
- Ignore quilts: Skips non-solid surface geometry (quilts), which often represent construction or reference geometry.
- Assign mass properties: assigns estimated mass properties to the Shrinkwrap model based on the source.
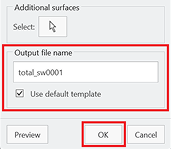
Finishing shrinkwrap
Double check that the output file name is updated and matches your intent, then click OK.
Once it has finished shrinkwrapping, open the output Creo file.
Go to File > Open and then export the file by going to File > Save As > Save a Copy
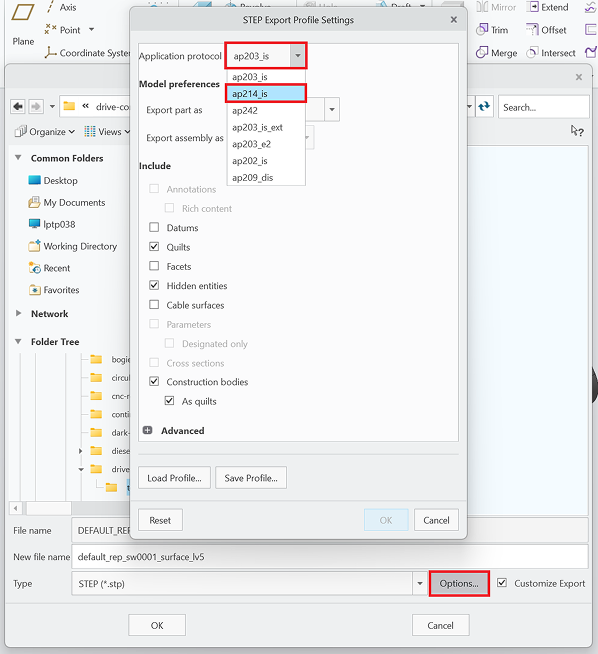
Set the Type to STEP.
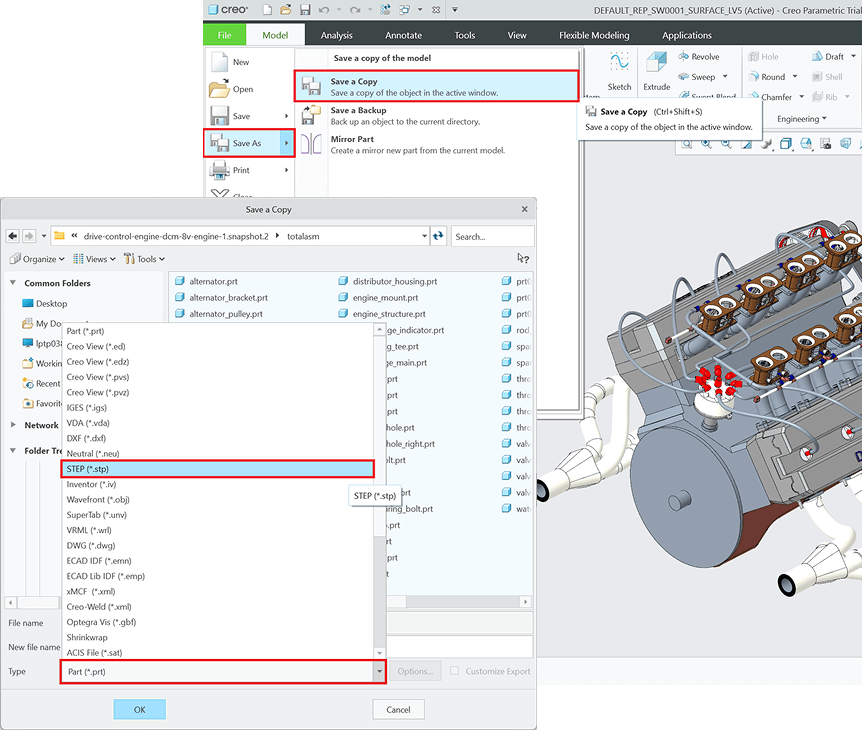
Before saving, click Options and choose AP214 as the application protocol before clicking OK.
Repeat this process for each sub-assembly or component that needs to move independently in JigSpace.
Once exported, import all STEP files created via this Shrinkwrap process into JigSpace and reassemble the model layout.

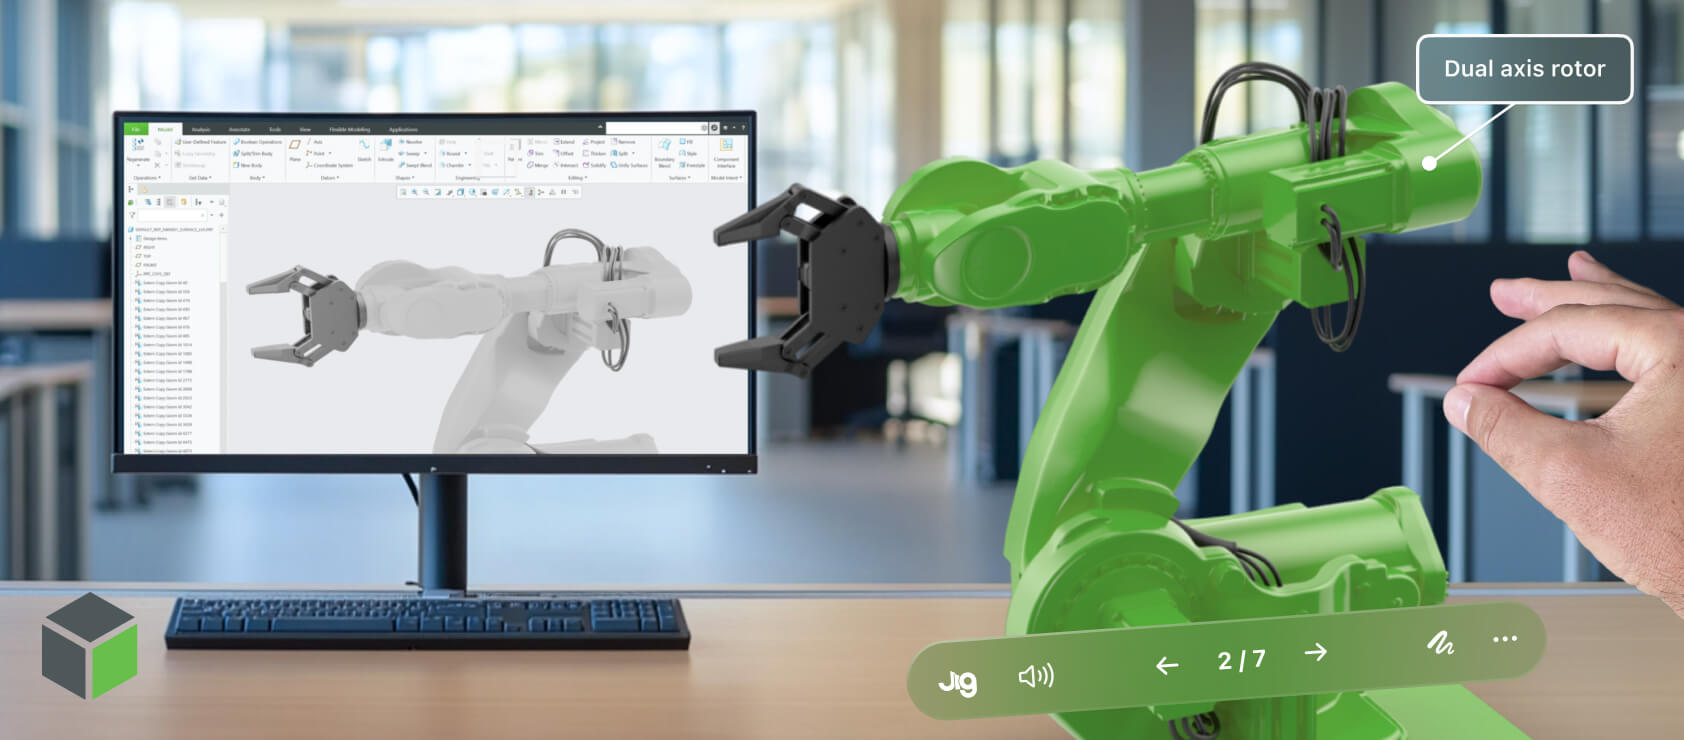
Using the performance indicator
When creating a Jig, the performance indicator in the editor displays a read out of your current triangle count and number of meshes (or sub-objects). Understanding this will help you determine when to optimize or simplify the 3D models in your Jig.
For best results we recommend less than 200,000 triangles (or polygons) and less than 50 sub-objects. However, depending on your models and the viewers that you are focused on (for example Vision Pro v embedded web views) you may be safe going up to 500,000-1 million triangles.
Jigs also default to automatically keep your 3D models optimized, which we recommend keeping toggled on.

Final thoughts
Whilst there are several ways to simplify your models in Creo for improved performance in JigSpace, you may find that you still need further optimization.
If this occurs, please get in touch with us. As always, your feedback on our tutorials and documentation is also very welcome.


