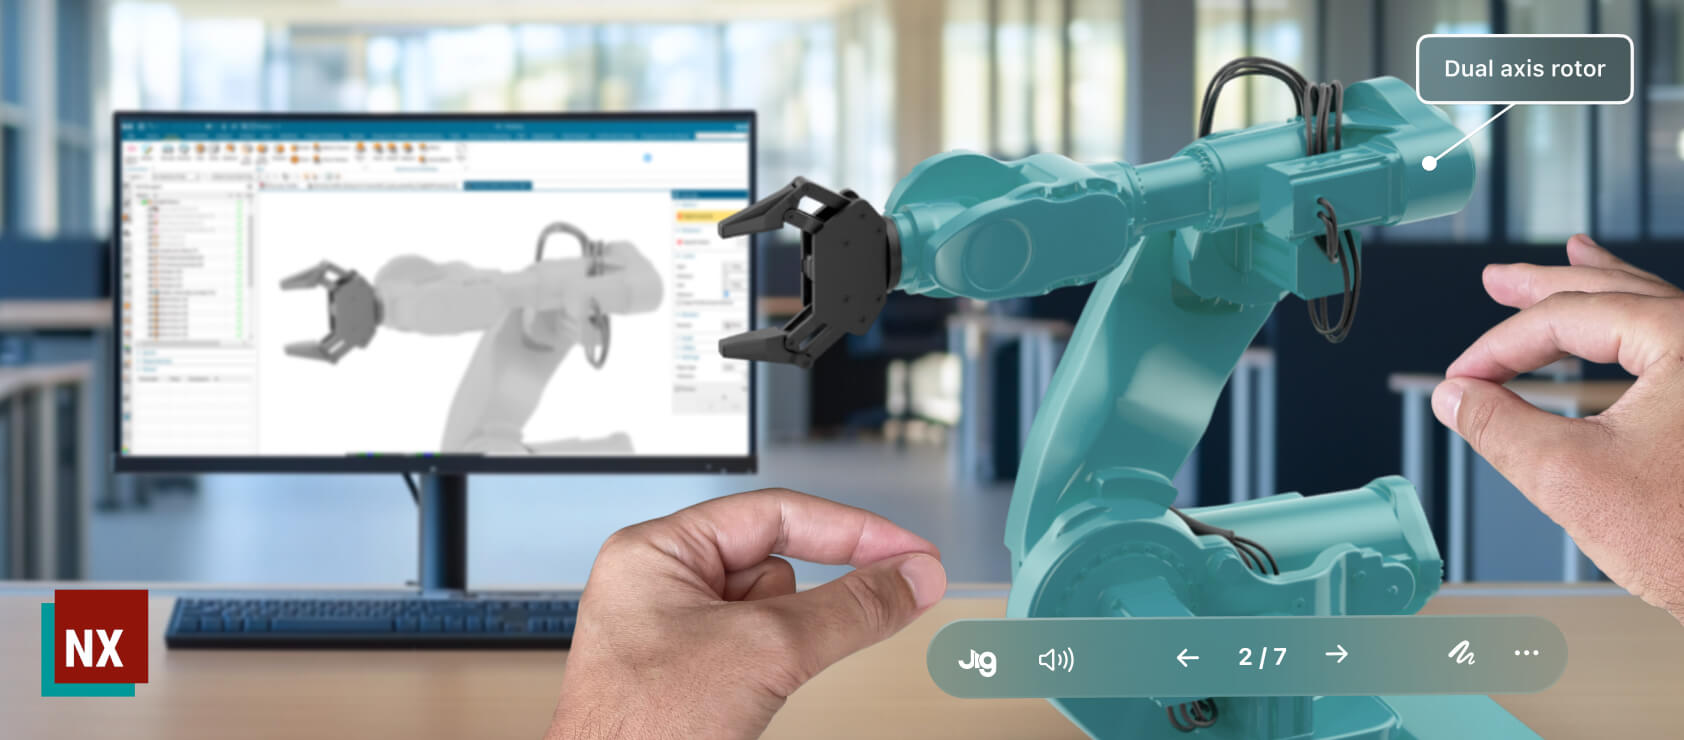
This guide is aimed at Siemens NX users who frequently work with complex assemblies and want to reduce the number of objects or triangle count in their 3D models in JigSpace. The following process works for both parts and assemblies in Siemens NX.
Export formats
For best results, we recommend you export all Siemens NX assemblies or parts as STEP AP214 files for importing into JigSpace. The STEP AP214 configuration will split meshes by materials and colors, and preserve these settings.
Due to the nature of file conversion, this approach is recommended to retain as much geometry and metadata as possible while giving you greater control over the output.
Planning ahead
Before you begin, consider which components, sub-assemblies, or features will need independent movement in JigSpace, as these should be simplified separately.
For example if you want to create an animated exploded view of some parts, they will need to be separate parts when exported.
Alternatively, if you simply want to exclude parts that are sensitive, or not needed, ensure they are not selected when exporting your final STEP file from Siemens NX.
Simplifying assemblies in Siemens NX
Open your model file in NX and navigate to Assemblies > Simplify
If this option is not in your toolbars simply search “simplify” and click on “Simplify Assembly”

A small popup window will appear, if you can’t immediately see it - it could be on another monitor/screen
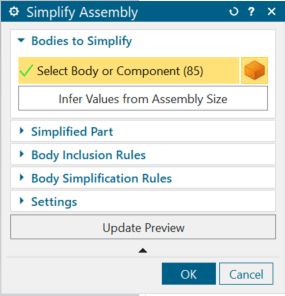
Next, select the bodies/components that you’d like to simplify. By default it will select all of them.
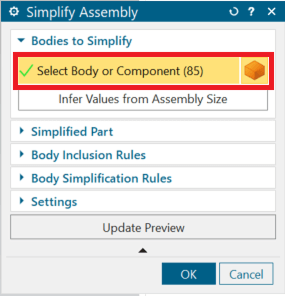
To retain special details or high fidelity of specific parts that are important in your Jig presentation, ensure you unselect those parts at this step.
Simplify body inclusion rules
Expand all of the drop down menus
Under body inclusion rules > remove small bodies > ensure this box is checked and input the maximum body size to remove.
This is ideal for removing small parts like rivets, pins, nuts, bolts, and other fasteners that can dramatically reduce the performance of your 3D files in augmented reality.
Body size value will depend on your model, however after you input a value > click update preview > and determine from the preview window whether you’re satisfied with the value before proceeding to the next step below.
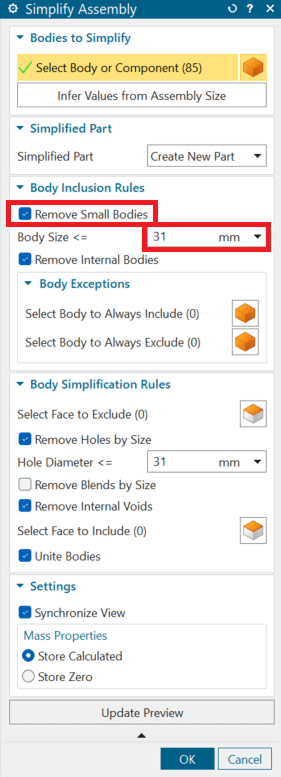
Depending on the intended use of your model, it is also good to tick Remove Internal Bodies.
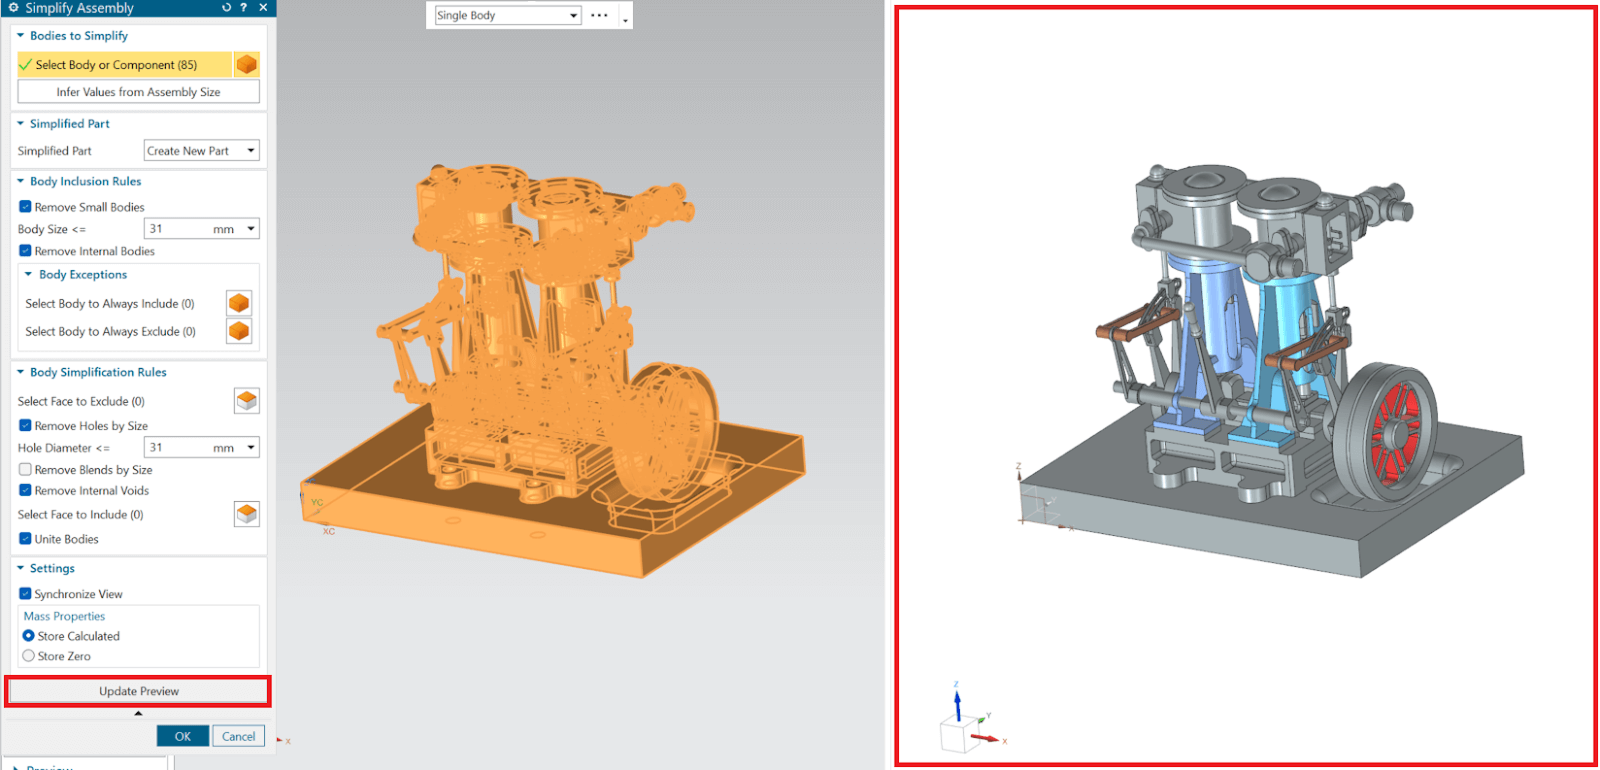
Body Simplification Rules
We often recommend include removing holes and internal voids. For example if you do not need to show animations of fasteners going into holes in parts of your assembly, then you can remove the holes to make your objects simpler and more performant.
In this example we are ticking Remove Holes by Size Hole Diameter and Remove Internal Voids.
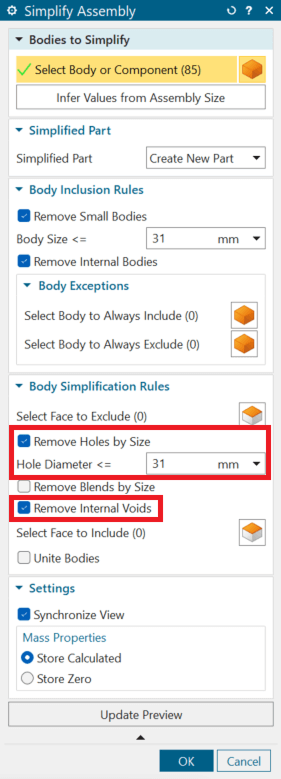
Removing internal voids can reduce wasteful detail for “hollow” parts of features that are not needed to be shown in your 3D presentation. If you are unsure, experiment by previewing your model before finalizing for export.
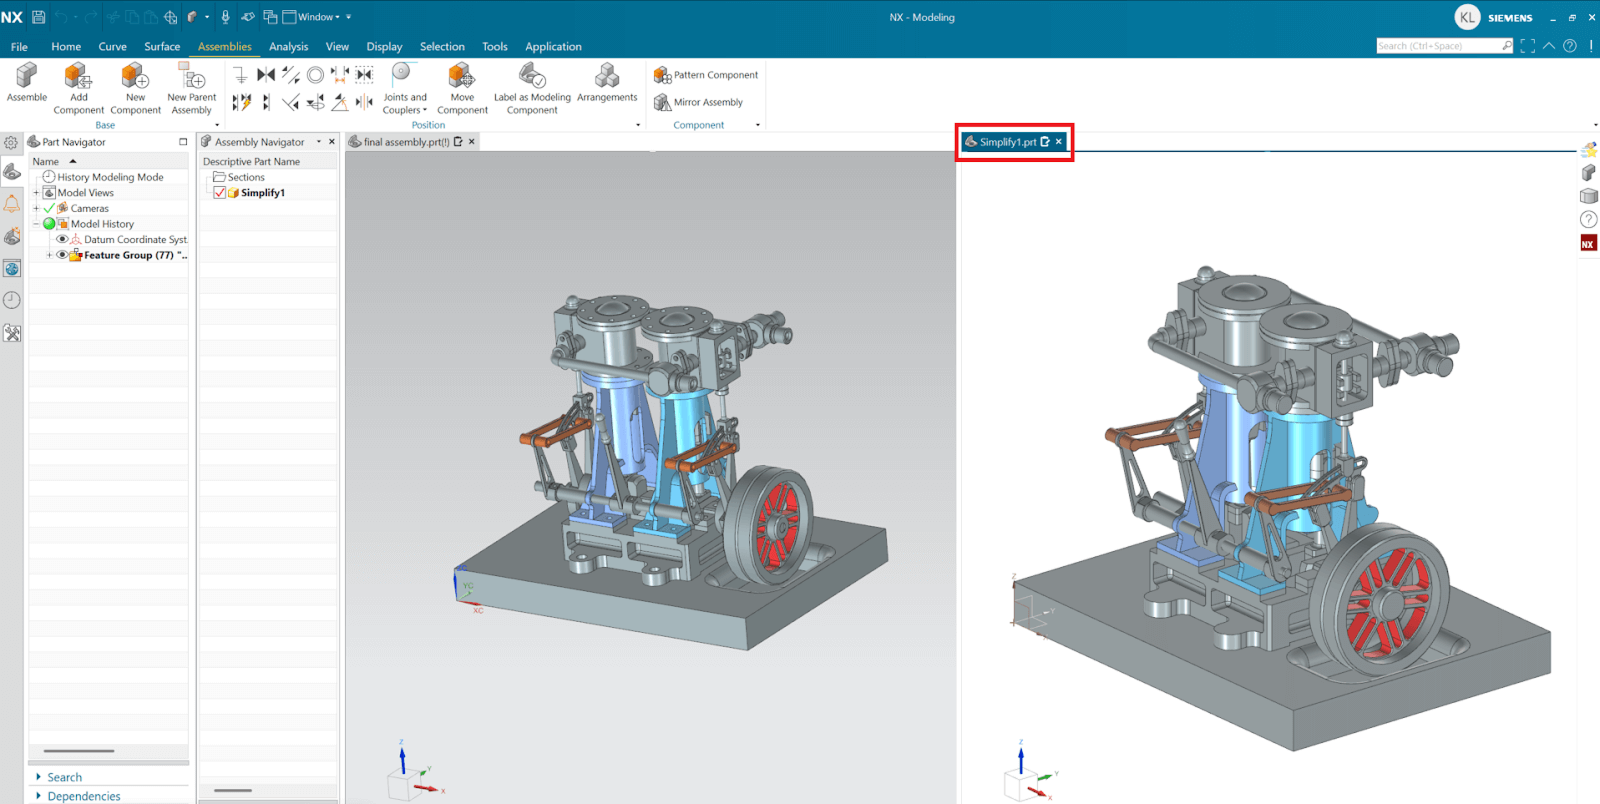
Exporting to JigSpace
To export your new model to JigSpace we recommend using the STEP format.
Start by clicking on the model tab of your new simplified model.
Then follow these steps:
- Click File > Export > STEP File
- Configure as:
- Displayed Part (not existing part)
- Application Protocol AP214 (STEP214)
- Specify your file location
- Click OK.

Uploading simplified NX model to JigSpace
You can add this model to JigSpace in two ways. Choose the method that best suits your part of your teams workflow.
Upload directly into your Jig presentation
If you’re responsible for creating a Jigs, or new to adding Siemens NX files to JigSpace, we recommend using the main JigSpace app for Windows, Mac, or iPad. This will give you the ability to instantly inspect your model and confirm your exported file meets your needs.
Create a new Jig and click on the ‘Add content’ button to import your STEP file. Inspect your model, move and arrange your parts and objects on different steps as necessary to ensure you have the required detail you expected from NX.
Upload to team object library
If you’re happy with your file in JigSpace, you can add it to your Team Library from the app.

Alternatively, if you’re an experienced Jig user and confident in your STEP export from NX, you can upload it directly to your team library for reuse by your teams creators via our bulk upload feature in the admin dashboard. This is particularly useful if you have multiple files to upload and want to add them in one bulk action.
Learn more about using the team object libraries here.
Using the performance indicator
When creating a Jig, the performance indicator in the editor displays a read out of your current triangle count and number of meshes (or sub-objects). Understanding this will help you determine when to optimize or simplify the 3D models in your Jig.
For best results we recommend less than 200,000 triangles (or polygons) and less than 50 sub-objects. Jigs also have an option to automatically keep your 3D models optimized, which we recommend keeping toggled on.

Final thoughts
Whilst there are several ways to simplify your models in NX for improved performance in JigSpace, you may find that you still need further optimization.
If this occurs, please get in touch with us.
As always, your feedback on our tutorials and documentation is also very welcome.


