There are important differences in hiding and deleting objects from steps and Jigs, when creating 3D presentations in JigSpace.
Hiding objects is possible on any step, object, or sub-object. Use this to:
- Show inside parts or remove unwanted objects entirely
- Hide exterior parts temporarily to edit interior or hidden parts
Deleting objects is only possible on a whole object, which removes it entirely from all steps in your Jig. You should only do this when you no longer want to use a model at all in your Jig.
Hide and show objects
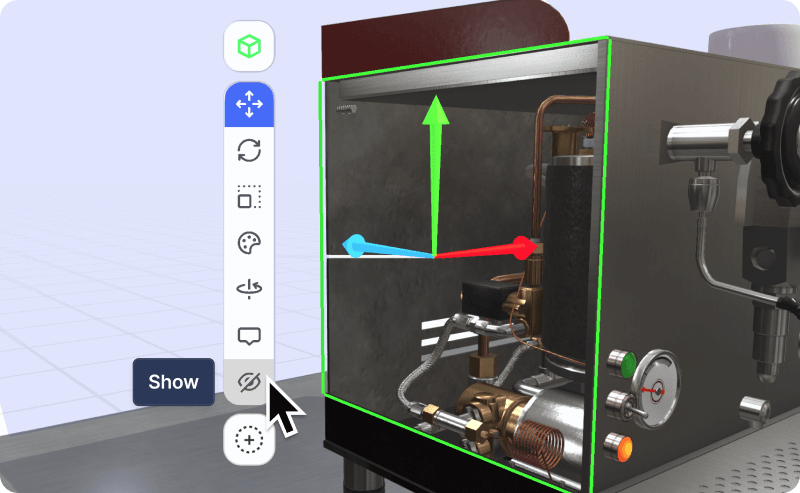
You can hide objects and show them from step to step, using the {icon-eye.svg} in the object list and floating toolbar.
When you make an object hidden, it is inactive on that step. You can select objects behind hidden ones while editing, and your viewers can interact with objects or parts behind hidden objects as well.
Hiding (and not deleting), is a safer way to remove parts of a model from your whole Jig that you don't want to see, as they can be un-hidden or shown anytime in the future if you change your mind.
You can hide any sub-object, child part, a group of parts, or a whole object. Objects can be shown on one step, and hidden on another, or hidden on all steps.
Tweening
Objects that are shown on one step, and hidden on another, will fade between steps when users go from that step to the next.
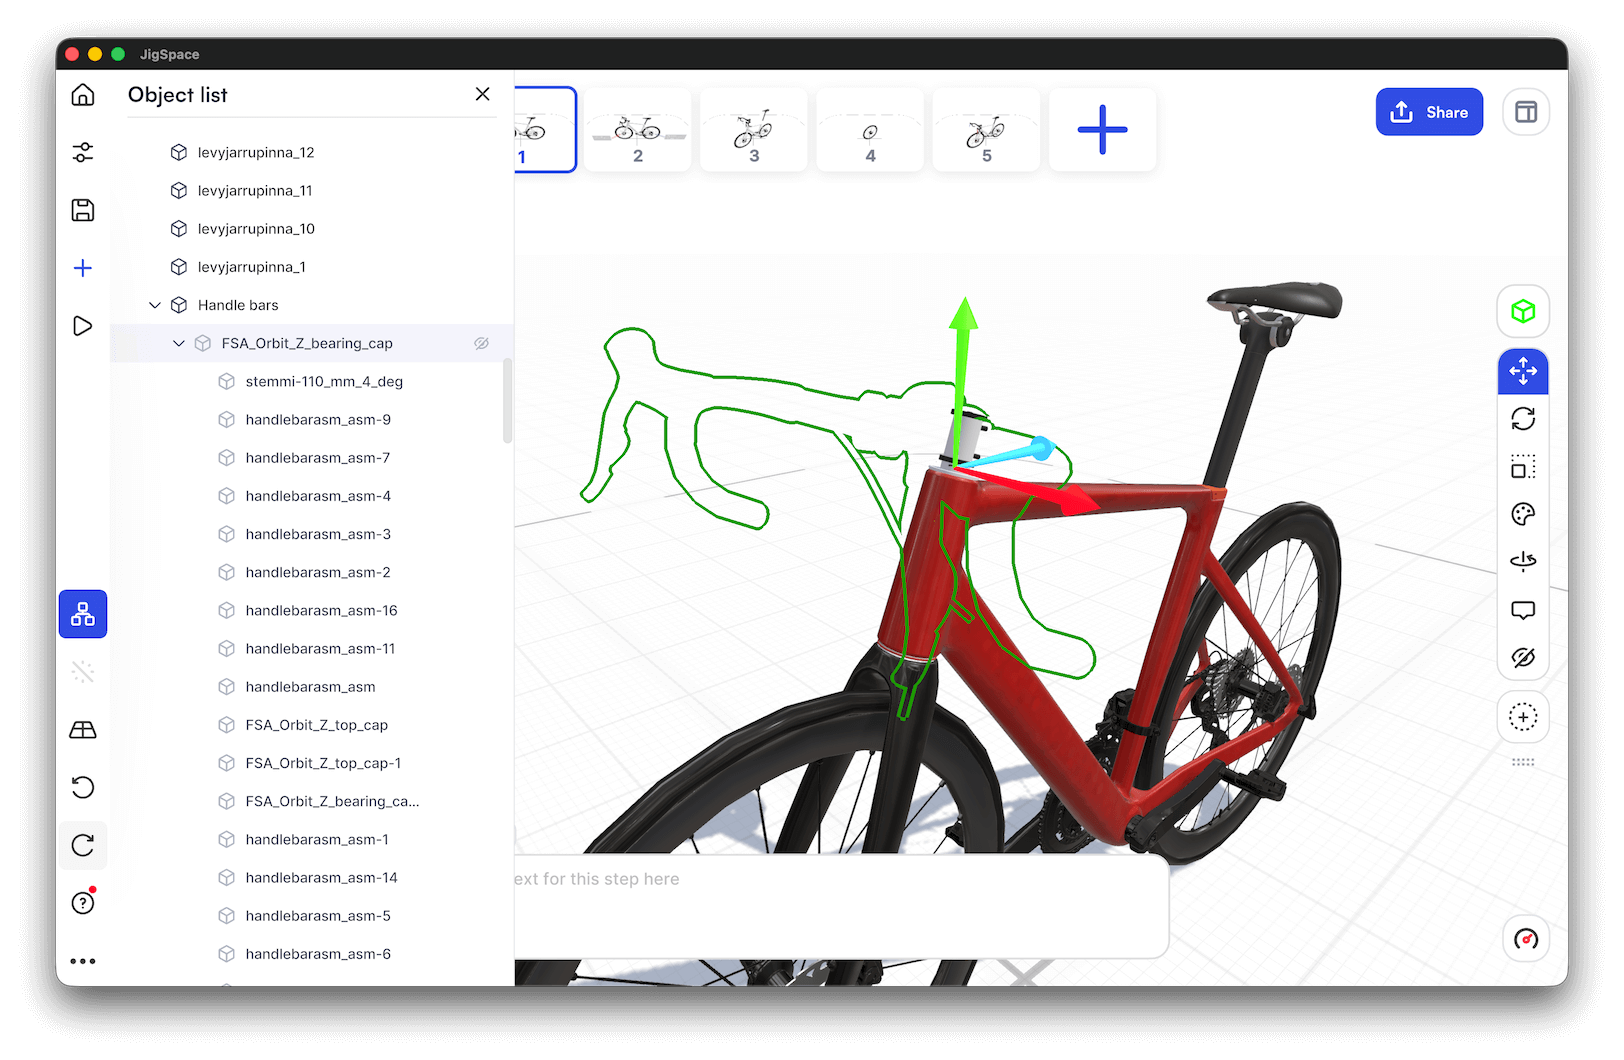
Hide or show objects on all steps
Replicate the shown or hidden state of your objects to all or a section of your steps by clicking and holding the {icon-eye.svg} icon in the toolbar to reveal the replicate tool menu.
This will enable you to copy and paste the hidden state to the same object on all steps, previous steps, following steps, or to a specific step.
Transparency
Hiding an object is different to its "transparency" which is where an object has its alpha channel (transparency) set to between 0-100 in the color and material settings and are still rendered on each step in some form.
To edit transparency of an object:
- Click on the object/s you want to adjust
- Click on {icon-color.svg} in the toolbar
- Adjust the {icon-alpha.svg} alpha transparency
Hiding objects overrides transparency when determining if an object is visible. For example: if you have an object with 50% transparency, but it is hidden, it will not be shown.
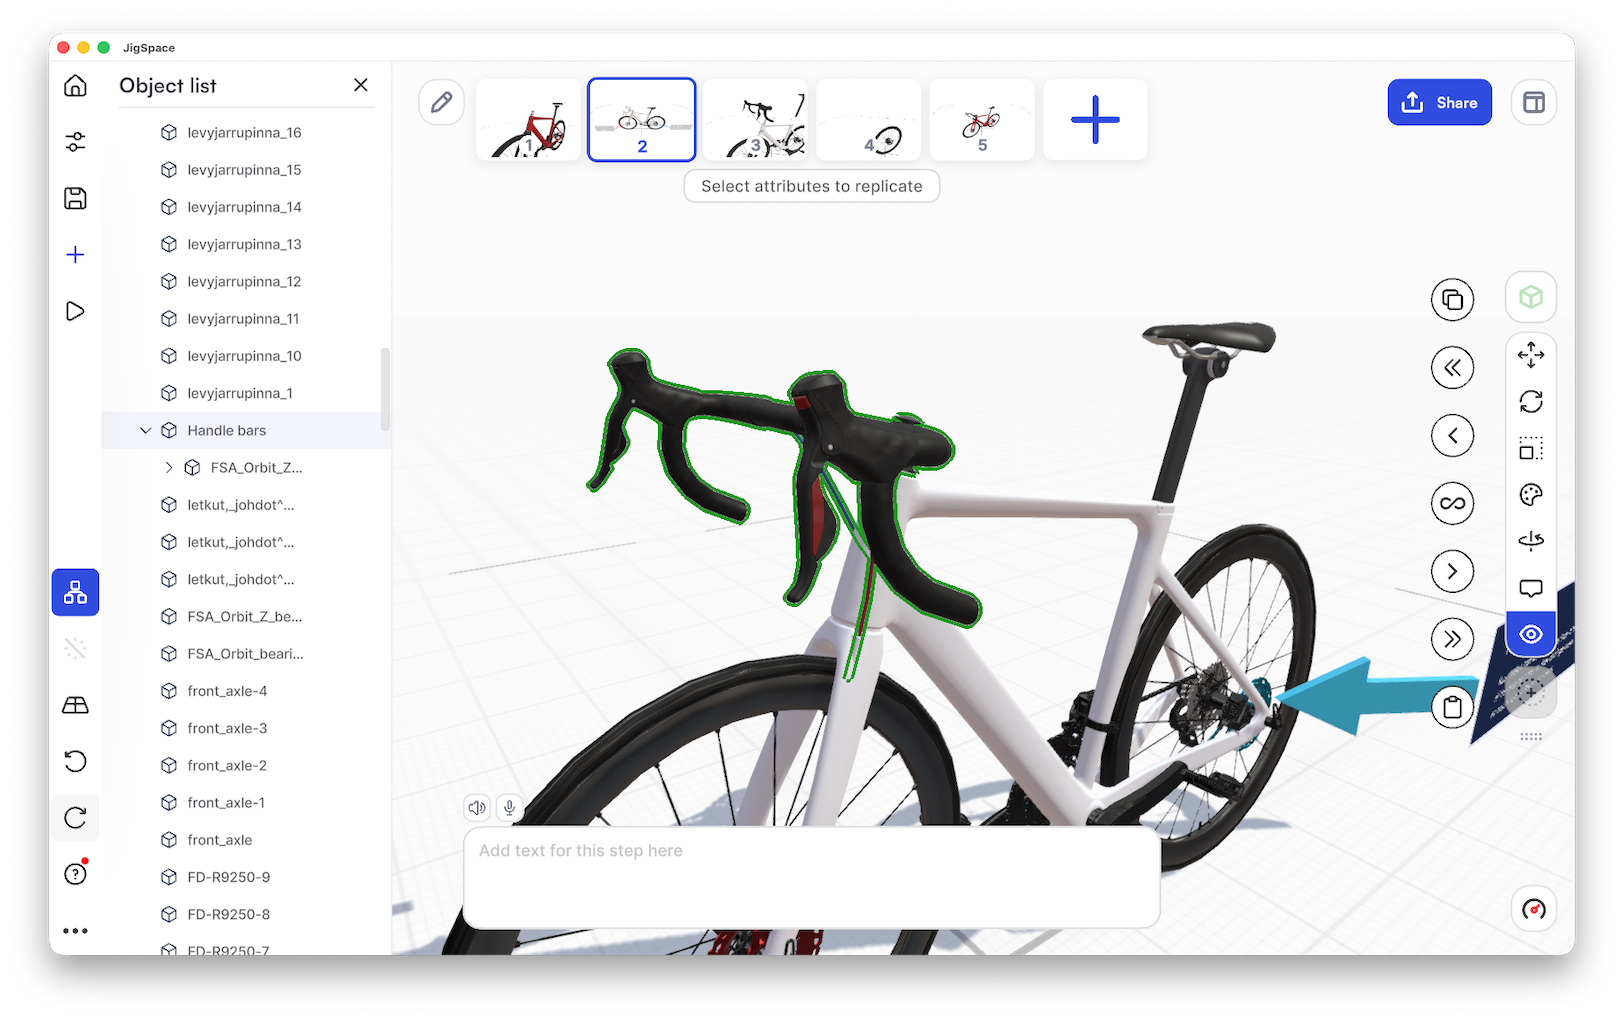
Deleting objects
It is only possible to delete a whole object from a Jig, which will delete it entirely from all steps.
Object list
Opening the object list panel, and clicking the {icon-delete.svg} delete icon in on the whole object. You will be asked to confirm before doing this, and it will remove the whole objects and all child-objects, from all steps in your Jig.
Keyboard shortcut
You can also select an object in the viewport, ensure it is in whole object mode (blue outline) and press the Delete key on your keyboard. You will be asked to confirm before the object is removed from your Jig.
Undo Delete
If you have accidentally clicked the delete button while editing your objects you can undo this mistake with the Undo {icon-undo.svg} button.
Replace objects
If you are deleting a model to replace it with an updated version, you can use the replace feature. This removes your selected object and replaces it with your selection, and remembers the position, rotation, scale and other transform properties of the removed object.
To replace a model:
- Select the model you want replaced
- Click on the {icon-add-object.svg} add objects menu
- Click {icon-replace.svg} Replace 3D object
- Select the location of your replacement model

This is particularly helpful if you are replacing a model with a similar model that has undergone some optimization or minor changes in a design tool. If you object parts and names are maintained, any transforms and formatting you make on them will be restored when your new model is uploaded.