
JigSpace compresses and optimizes 3D models so they load faster and run smoothly in AR. You can use automatic optimization, manual preparation in tools like Blender, or a combination of both.
What affects performance
Two things matter most: how many separate objects it contains, and how many triangles (i.e. polygons) your model has. A single 3D model can have anywhere from 1 to 1,000s of objects within it. Your Jigs may have only one 3D model, or a great deal more inside it. Understanding this structure is important when we show you “performance metrics” in your Jig.
If you can, we recommend staying under 200,000 polygons and 200 sub-objects per Jig. Go higher and you risk seeing a reduction in framerates or even crashes, especially on phones and older devices.
Finding problem areas
Performance panel
The performance panel tells you if you're over the limits and shows what automatic optimization can do about it.

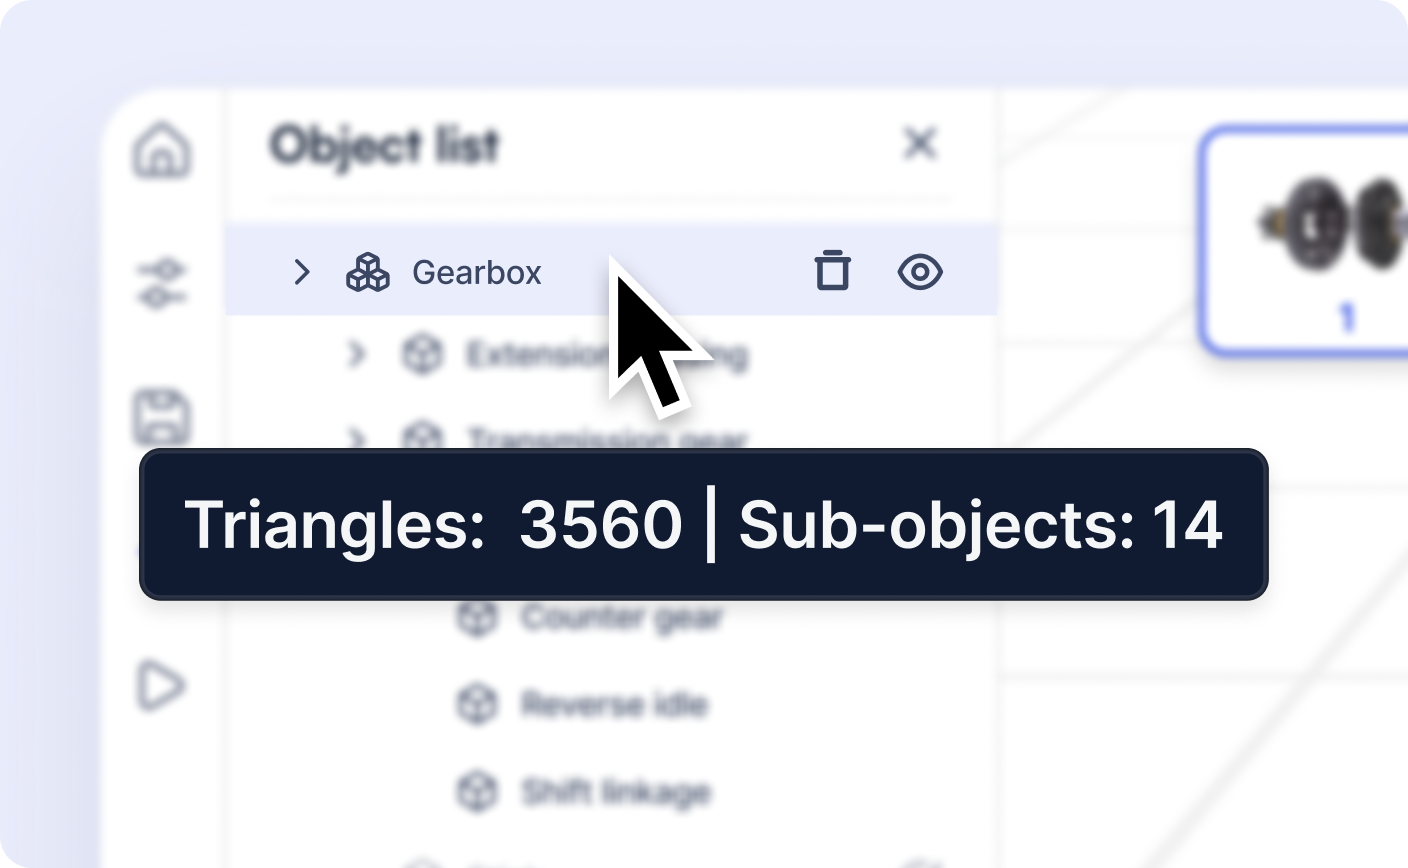
Hover details in the object list
When you're editing a Jig, hover over any object to see its mesh count and triangle count. You can also see how many triangles are in each individual mesh. This makes it easier to spot the heavy hitters that are slowing things down.
Automatic optimization
When you import a 3D file, JigSpace compresses it to reduce load times. We also optimize components as you build your Jig.
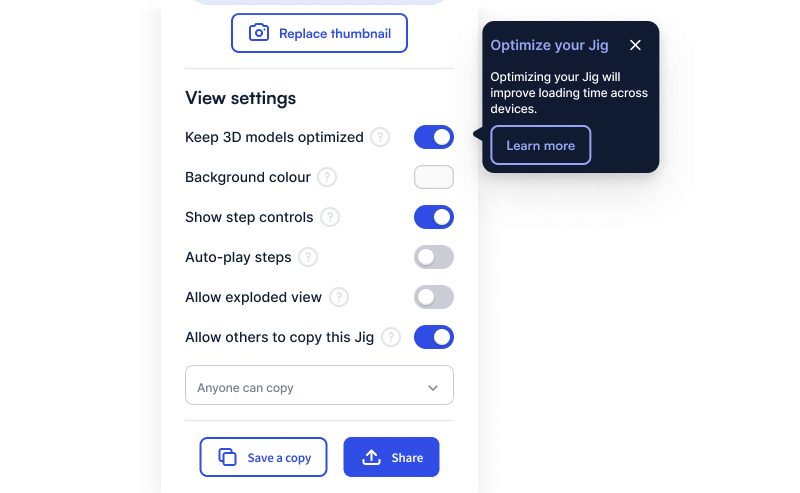
If this causes problems with how your model looks, you can turn it off. Toggle Keep 3D models optimized in the performance panel or Jig settings.
Custom optimization tools
The Admin Dashboard has three optional tools you can apply during bulk uploads to your team object library. Use them individually or together.
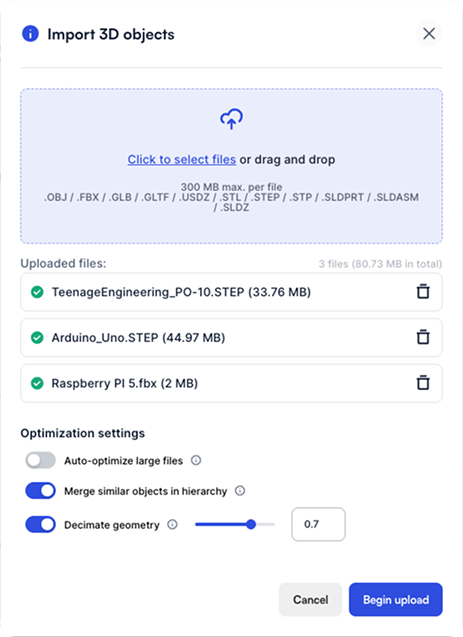
Merge similar objects by hierarchy
This setting merges child objects into their parent when they share the same material properties and don't have children of their own. Fewer meshes means better performance, particularly on mobile.
This setting can be useful when you have a very detailed model with large numbers of small parts like fasteners that don’t need to be moved or highlighted in your Jig presentation.
Decimate model
Decimation reduces triangles by lowering mesh resolution. You set a rate from 0.01 to 1 and it is applied regardless of how many triangles your model has.
Be careful with this one. It's blunt: and is relatively uniform, which means it applies a similar reduction everywhere, which can make detailed areas look rough. That said, it's useful for getting oversized CAD files into a working state quickly for a proof of concept, even if the result isn't final quality.
Automatically optimize extra-large files
This combination of merging and decimation kicks in when a model has more than 1,000 objects or 750,000 triangles. It merges child meshes that share the same material into their siblings under the same parent. Fewer meshes means better performance, particularly on mobile. It then also decimates objects at a rate of 0.70 to reduce the overall triangle count by around 30%.
Manual optimization
Preparing files in Blender
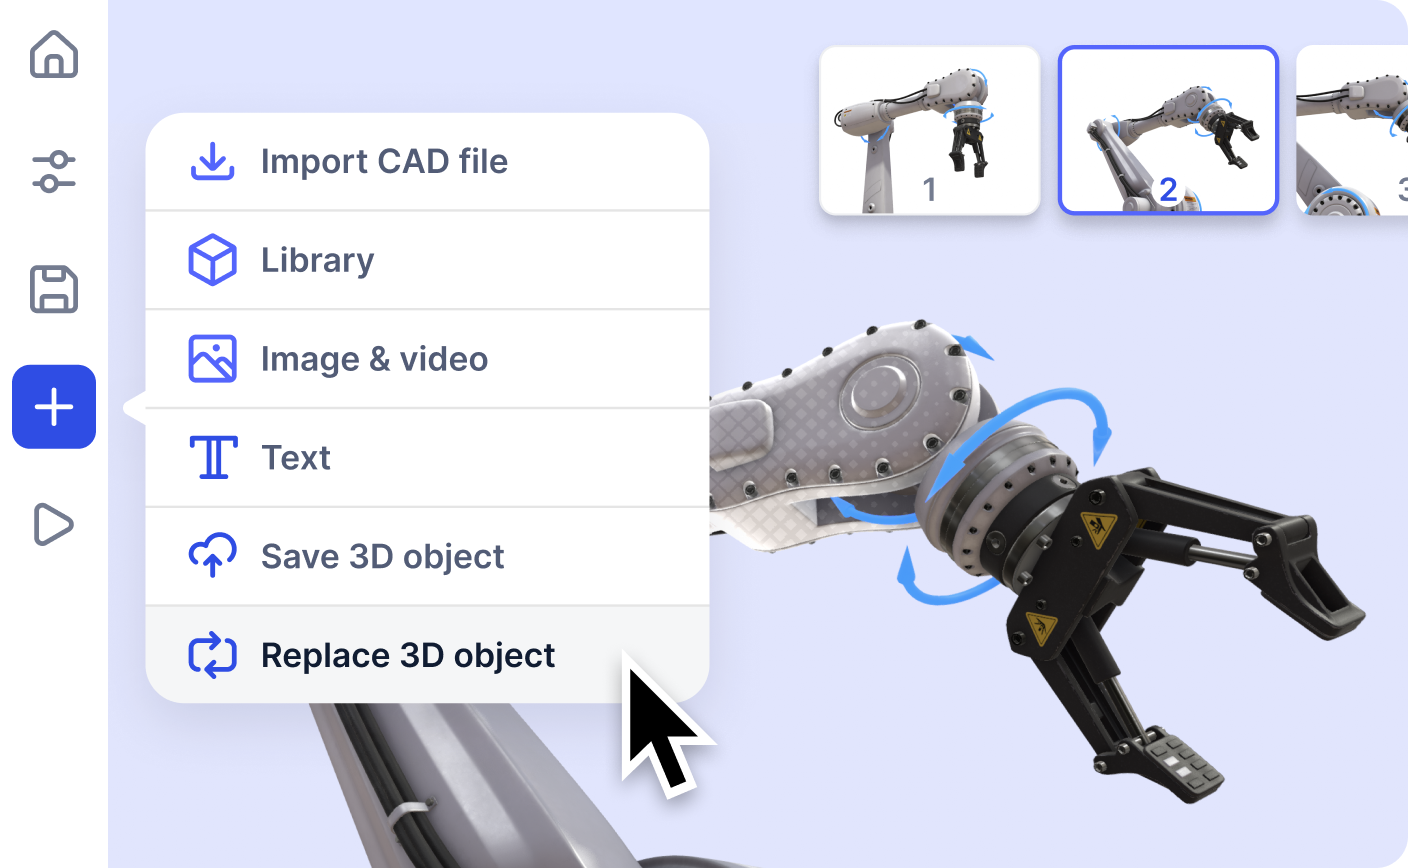
You can optimize models yourself before importing. Our Blender template makes this easier: optimize, push to your library, and use Replace to test in your Jig.
Watch the 3D model preparation tutorial below and download the Blender template for JigSpace here.
Export settings from CAD
When exporting from SolidWorks, Inventor, Creo, or similar:
- Simplify geometry. Remove small details that won't be visible, like internal fasteners or tiny features.
- Use decimation to reduce polygon count while keeping the overall shape.
- Try the built-in simplify or shrinkwrap tools. Most CAD software has a range of features like this.
- Consider standalone reduction tools if you need more control.
Reducing polygons also reduces detail, so there's always a tradeoff. Start aggressive and dial back if the result looks too rough.
Guides for specific CAD software
We have step-by-step guides for simplifying CAD files and assemblies in several of the most popular CAD programs. Download the guides below.
Updating models after optimization
Replace tool
Say you've optimized a model in Blender and want to test it in your Jig. Use the Replace tool in the Workshop to swap in the new version without redoing all your step changes.
The Replace tool copies over the position, scale, and step assignments from the old object. You don't have to match everything up manually, which saves a lot of time when you're iterating.
Further reading
Click on the links below to learn more about 3D model optimization, improving the performance of your Jigs, and how to get the perfect 3D models for your next Jig from a range of websites.